Difference between revisions of "InkShield Project"
(New page: I acquired an InkShield from this [http://www.kickstarter.com/projects/1908026860/inkshield-an-open-source-inkjet-shield-for-arduino Kickstarter]. My goal for this project is to have a sma...) |
|||
| (6 intermediate revisions by one user not shown) | |||
| Line 2: | Line 2: | ||
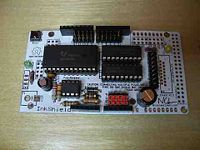
[[Image:Inkshield001b.jpg|none|thumb|200px|InkShield PCB]] | [[Image:Inkshield001b.jpg|none|thumb|200px|InkShield PCB]] | ||
| − | == | + | |
| + | == Build == | ||
| + | So this worked out pretty nice, the code reads 5 button values from the free analog input 5. Just holding the button down repeats the messages printed. You can see that different font widths can be achieved by moving the print head faster or slower. | ||
| + | |||
| + | {| | ||
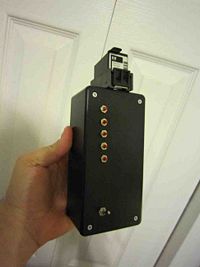
| + | | [[Image:Inkshield002.jpg|none|thumb|200px|InkShield in enclosure]] | ||
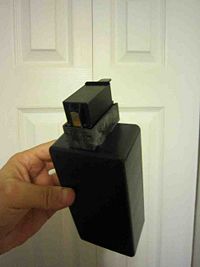
| + | | [[Image:Inkshield003.jpg|none|thumb|200px|InkShield underside]] | ||
| + | | [[Image:Inkshield004.jpg|none|thumb|300px|Preset messages]] | ||
| + | |} | ||
== Code == | == Code == | ||
| − | I | + | I banged together the inkshield sample code with OneAnalogPin5switches code. To update the messages printed I update the sketch and re-burn to the arduino. One could write a serial menu interface to store messages in flash, but that is way down the road. [[Image:InkShield5Buttons_v.01.pde]] (Note: I just noticed that the debug mode does not work, but the code otherwise works fine. This may or may-not be resolved at some point.) |
| + | |||
| + | |||
| + | == Other Notes == | ||
| + | As the inventor of the InkShield states, it's wise to remove the ink cartridge from its holder before updating the sketch on the Arduino, I had it spew ink out during this process once. Fortunately my project was sitting on a plastic bag when this happened and not directly on the couch. Also I keep the unit in a cheap grocery-store plastic sack when not in use. The Ink cartridge will smear and wick onto anything it touches, watch your clothes and furniture. It's also a good idea to keep a kleenex on-hand, the printhead needs occasional cleaning. | ||
| + | |||
| + | [[Category:dosman projects]] [[Category:arduino]] | ||
Latest revision as of 10:54, 25 September 2012
I acquired an InkShield from this Kickstarter. My goal for this project is to have a smallish enclosure to contain the system and buttons on the top which allow different messages to be printed.
[edit] Build
So this worked out pretty nice, the code reads 5 button values from the free analog input 5. Just holding the button down repeats the messages printed. You can see that different font widths can be achieved by moving the print head faster or slower.
[edit] Code
I banged together the inkshield sample code with OneAnalogPin5switches code. To update the messages printed I update the sketch and re-burn to the arduino. One could write a serial menu interface to store messages in flash, but that is way down the road. File:InkShield5Buttons v.01.pde (Note: I just noticed that the debug mode does not work, but the code otherwise works fine. This may or may-not be resolved at some point.)
[edit] Other Notes
As the inventor of the InkShield states, it's wise to remove the ink cartridge from its holder before updating the sketch on the Arduino, I had it spew ink out during this process once. Fortunately my project was sitting on a plastic bag when this happened and not directly on the couch. Also I keep the unit in a cheap grocery-store plastic sack when not in use. The Ink cartridge will smear and wick onto anything it touches, watch your clothes and furniture. It's also a good idea to keep a kleenex on-hand, the printhead needs occasional cleaning.


